I had always dreamed of standing at the foot of Mount Everest. The idea of trekking to Everest Base Camp had been in my mind for years, but it wasn’t until last year that I finally decided to make it a reality. With the excitement of the adventure ahead, I began planning the trek of a lifetime.
Chapter 1: Preparing for the Trek
Before I could step foot on the trail to Everest Base Camp, there was a lot to prepare. I did extensive research on the trek, ensuring I knew exactly what to expect. The journey would take me through the rugged terrain of the Khumbu region, starting from Lukla, a small mountain town only accessible by a short, thrilling flight from Kathmandu. The trek to Everest Base Camp was about 12-14 days, and I knew I needed to be in good physical shape to handle the altitude and long days of hiking.
I also worked out my budget. Trekking to Everest Base Camp isn’t as expensive as I had initially thought, but it’s still a significant investment. Here’s a breakdown of my costs:
- Flights to Kathmandu: A round-trip flight from my home country to Kathmandu cost around $800 USD. The flights were affordable if booked in advance, but prices can vary depending on the time of year. You can book tickets from Qatar airways, Emirates, Turkish Airlines, Etihad Airways and Singapore Airlines.
- Trekking Permits: I needed to pay for the Sagarmatha National Park Permit and the Trekking Information Management System (TIMS) card. These cost about $30 USD and $10 USD, respectively. To pay the Sagarmatha National Park permit fee, you can obtain the permit either at the Nepal Tourism Board office in Kathmandu or at the park’s entry checkpoint in Monjo, paying in Nepali Rupees. Please note that there is no online system for paying the Sagarmatha National Park permit fee. For more info please click here.
- Guide and Porter: While not mandatory, I decided to hire a guide and a porter to make the trek easier and to learn more about the culture and history of the region. A guide will cost $25 to $35 USD per day for the both of you. A porter will cost $20 to 25 USD per day and the porter can carry the gear of both of you. I figured their assistance would also help me manage the long hikes and my luggage, so the total cost for both came to about $700 USD. You can also hire from Nepal Mother House Treks & Expedition Pvt. Ltd and Himalayan Scenery Treks & Expedition Pvt. Ltd.
- Accommodation & Meals: Accommodation in tea houses (small guesthouses along the trail) was affordable. A night in a tea house usually cost between $5 and $10 USD per night, and meals were around $5 to $8 USD per dish. As the altitude increased, prices became higher, but I budgeted around $15 to $20 USD per day for food and lodging. The Everest Summit Lodge and Mountain Lodges of Nepal have high quality lodges.
In total, I estimated the entire trek to cost around $1,500 to $2,000 USD, which covered everything from flights to accommodation, food, and the services of my guide and porter.
Chapter 2: Packing for the Trek
The packing list was crucial—this wasn’t a vacation to a beach resort. I needed to bring everything I would need to stay safe, warm, and well-fed in the unpredictable mountain conditions. Here’s what I packed:
- Trekking Boots: A sturdy pair of waterproof boots with good ankle support was essential for the rocky, often slippery terrain.
- Clothing Layers: I brought plenty of lightweight, moisture-wicking base layers, along with a down jacket, a fleece, and a waterproof outer shell to handle the changing weather. The temperatures could range from hot during the day to freezing at night, so layering was key.
- Sleeping Bag: A 4-season sleeping bag, rated for -10°C (14°F), was a must for those cold nights in the higher-altitude tea houses.
- Trekking Poles: I invested in a pair of trekking poles to help with the uneven trails and to take pressure off my knees.
- Backpack: I used a 40-liter backpack to carry my essentials. A larger duffel bag was sent ahead with the porter to carry the rest of my gear.
- Headlamp, Batteries and Power bank: With early starts and possible power cuts in the tea houses, I needed a reliable light source. Bring a big power bank and you might only need to recharge it once on the whole trek.
- Water Bottles and Water Purification System: Water was available from streams, but I wanted to purify it myself for safety. I carried a water bottle with a purification filter. For purification I used Steripen Classic 3 UV Water Purifier and for water bottle i used LifeStraw Peak Series – Collapsible Squeeze Bottle.
- First Aid Kit: I packed the basics—bandages, antiseptic wipes, and any personal medications I might need.
- Sunscreen & Lip Balm: The sun is intense at high altitudes, so I made sure to protect my skin from harmful UV rays.
- Snacks: Energy bars, trail mix, and chocolate were crucial for staying energized during long trekking days.
- Internet/Wi Fi: I bought a 10 GB/30 Day Everest Link Wi Fi card in Namche Bazaar and used this for the entire Everest base camp trek. Wi Fi costs anywhere from $5 to $10 USD per day if you buy it from the teahouses.
Chapter 3: The Trek Begins
I arrived in Kathmandu, the vibrant capital of Nepal, full of excitement. After a day of exploring the city and picking up any last-minute items, I caught a flight to Lukla. The flight itself was an adventure—flying between mountains with the tiny plane skimming along narrow valleys. Landing on Lukla’s short runway felt like something straight out of an action movie.
From Lukla, I began my trek. The first few days were spent walking through lush forests, crossing suspension bridges, and visiting beautiful Sherpa villages. I stayed in cozy tea house, which are the heart of the trekking experience. They provided basic but warm accommodations. A simple room with a bed, blankets, and a shared bathroom was all I needed, as the trekking days were long and tiring. The meals in these tea houses were hearty—Dal Bhat (lentil soup with rice) was a staple, along with soups, noodles, and fresh fruit when available.
Along the way, I passed other trekkers from all over the world. The tea houses were communal, and I spent my evenings chatting with fellow trekkers, sharing stories of our journeys. The atmosphere was friendly and supportive. I especially enjoyed hearing stories from Sherpas who had lived in the region for generations. They were full of knowledge and stories of the mountain.
Chapter 4: The Challenge of Altitude
The altitude at Everest Base Camp (EBC) is 5,364 meters (17,598 feet) above sea level. This is the point where trekkers and mountaineers set up camp before attempting to summit Mount Everest.
As I gained altitude, the air grew thinner, and I began to feel the effects of the elevation. My breathing became more labored, and I felt a bit more fatigued each day. This was the altitude sickness that many trekkers warn about, but I took it slow, ensuring I acclimatized by taking rest days in places like Namche Bazaar and Dingboche. I followed my guide’s advice to drink plenty of water, take aspirin for headaches, and never rush.
Accommodation became more basic as I ascended. AD Friendship Lodge with good amenities, offered a warm bed and a roof over my head. At night, the temperature dropped sharply, and I was grateful for my down jacket and blanket.
Chapter 5: Reaching Everest Base Camp
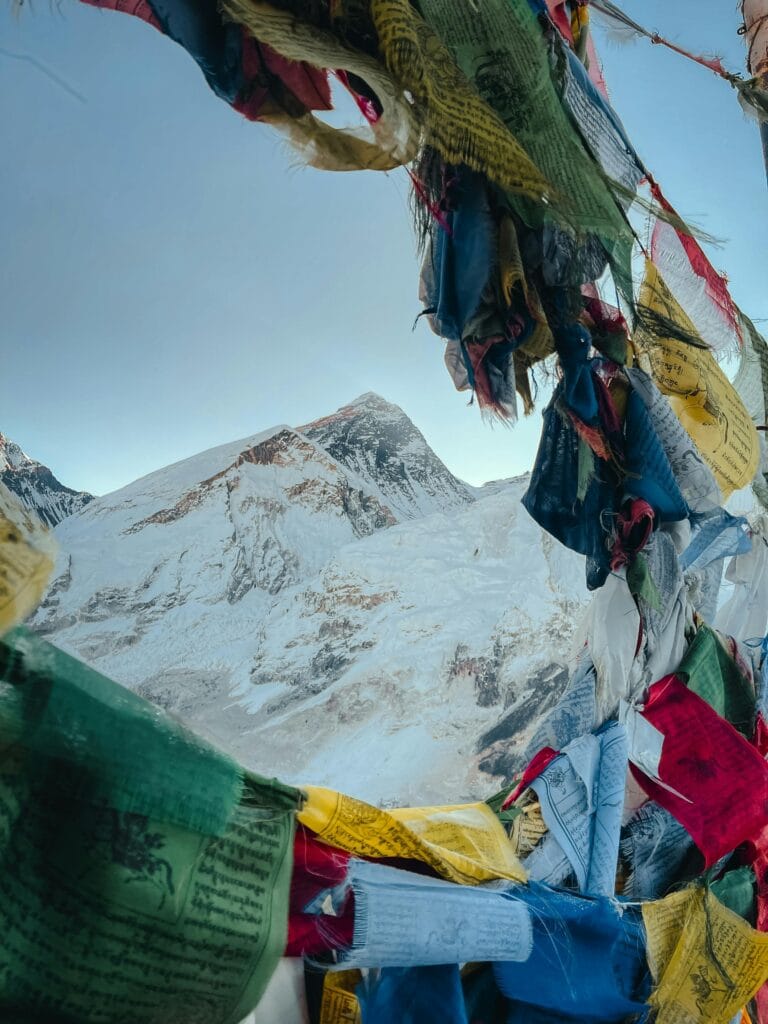
After 10 days of trekking, I finally arrived at Everest Base Camp. It was everything I had dreamed of and more. I stood in awe, surrounded by towering peaks, glaciers, and the massive icefall that descends from Everest’s summit. The wind was biting, but I couldn’t help but smile. I had made it.
The atmosphere at Base Camp was surreal. I spent a few hours taking in the views, taking photos, and reflecting on the journey I had just completed. I was exhausted, but the sense of accomplishment was overwhelming. I had pushed my limits, both physically and mentally, and now I was standing at the base of the world’s highest mountain.
I also visited Kala Patthar which is 5,644 meters (18,519 feet). It’s a viewpoint from where most trekkers can get the best views of Mount Everest. From there, I was rewarded with an incredible panorama of Mount Everest and other icy peaks like Pumori, Lhotse, and Nuptse.
Chapter 6: The Descent
The trek back was faster, but no less beautiful. I retraced my steps, heading back through familiar villages and tea houses. By the time I reached Lukla, I was exhausted but elated. My guide and porter had been incredible, and I was deeply thankful for their help along the way.
The experience had taught me so much—about resilience, the power of nature, and the kindness of the people who call the Himalayas home. I left Nepal with memories I would cherish forever, knowing that I had completed the incredible journey to Everest Base Camp.
Best Tours To Everest Base Camp
If you want to skip hassle of planning EBC trek of your own Klook has the best planning tours starting as low as $900 USD for a full 12-day trek.
Best Time To Visit Everest Base Camp
The best time to visit Everest Base Camp depends largely on the weather and your preferences for the trekking experience.
- Best Time: Spring (March to May) and Autumn (September to November) are the best times to trek to Everest Base Camp due to favorable weather, clear skies, and comfortable temperatures. These seasons have good weather and fewer crowds than the monsoon season.
- Peak Season: Autumn is the most popular and busy season, offering stable weather and stunning views.
- Winter & Monsoon: Winter is cold and harsh, while the monsoon season can bring difficult trekking conditions due to rain and slippery trails.
For the best experience, plan your trek for either spring or autumn, as these seasons offer the clearest weather, the most predictable conditions, and the best trekking experience.